7.2 KiB
Addition of repository procedure
Introduction
This document is a guide on how to add your own repository to store your projects and exercises. This guide assumes that you have understood the files structures of the repository public. It will only address the settings part of this task. The addition of projects will be treated first as it does not require the knowledge of Docker.
However being familiar with Docker is mandatory for adding your own exercises with your own tests.
Prerequisites
- A GitHub account where your exercises repository will be stored https://github.com
- A Docker Hub account https://hub.docker.com
Setup of GitHub repository
Create your own public repository
Once logged into your GitHub account, click on the creation of new repository:
It is the button New (the button is on the top corner right side).
Git clone your repository and prepare an example for the folder structure for projects
- Create a folder called
subjects. - Inside this folder create a folder called what you wish (example:
firstproject). - Inside the folder
firstprojectcreate aREADME.mdfile which you will use as the subject content of your first project. - After the subject content
README.mdis created, create a folderauditinside thefirstprojectdirectory. - Inside the
auditfolder create aREADME.mdthat respect the audit type of file. We advise you to take an example such as the ascii-art auditREADME.mdfile. Here is the link to the raw file. - Once all those files are done, git push them to your new repository.
Publish the repository on GitHub pages
- Go to the settings tab of your projects repository.
- On the option page find the GitHub Pages section.
- Please see below the settings to follow. (Please not that it might take up to 10 mins for your page to be published)
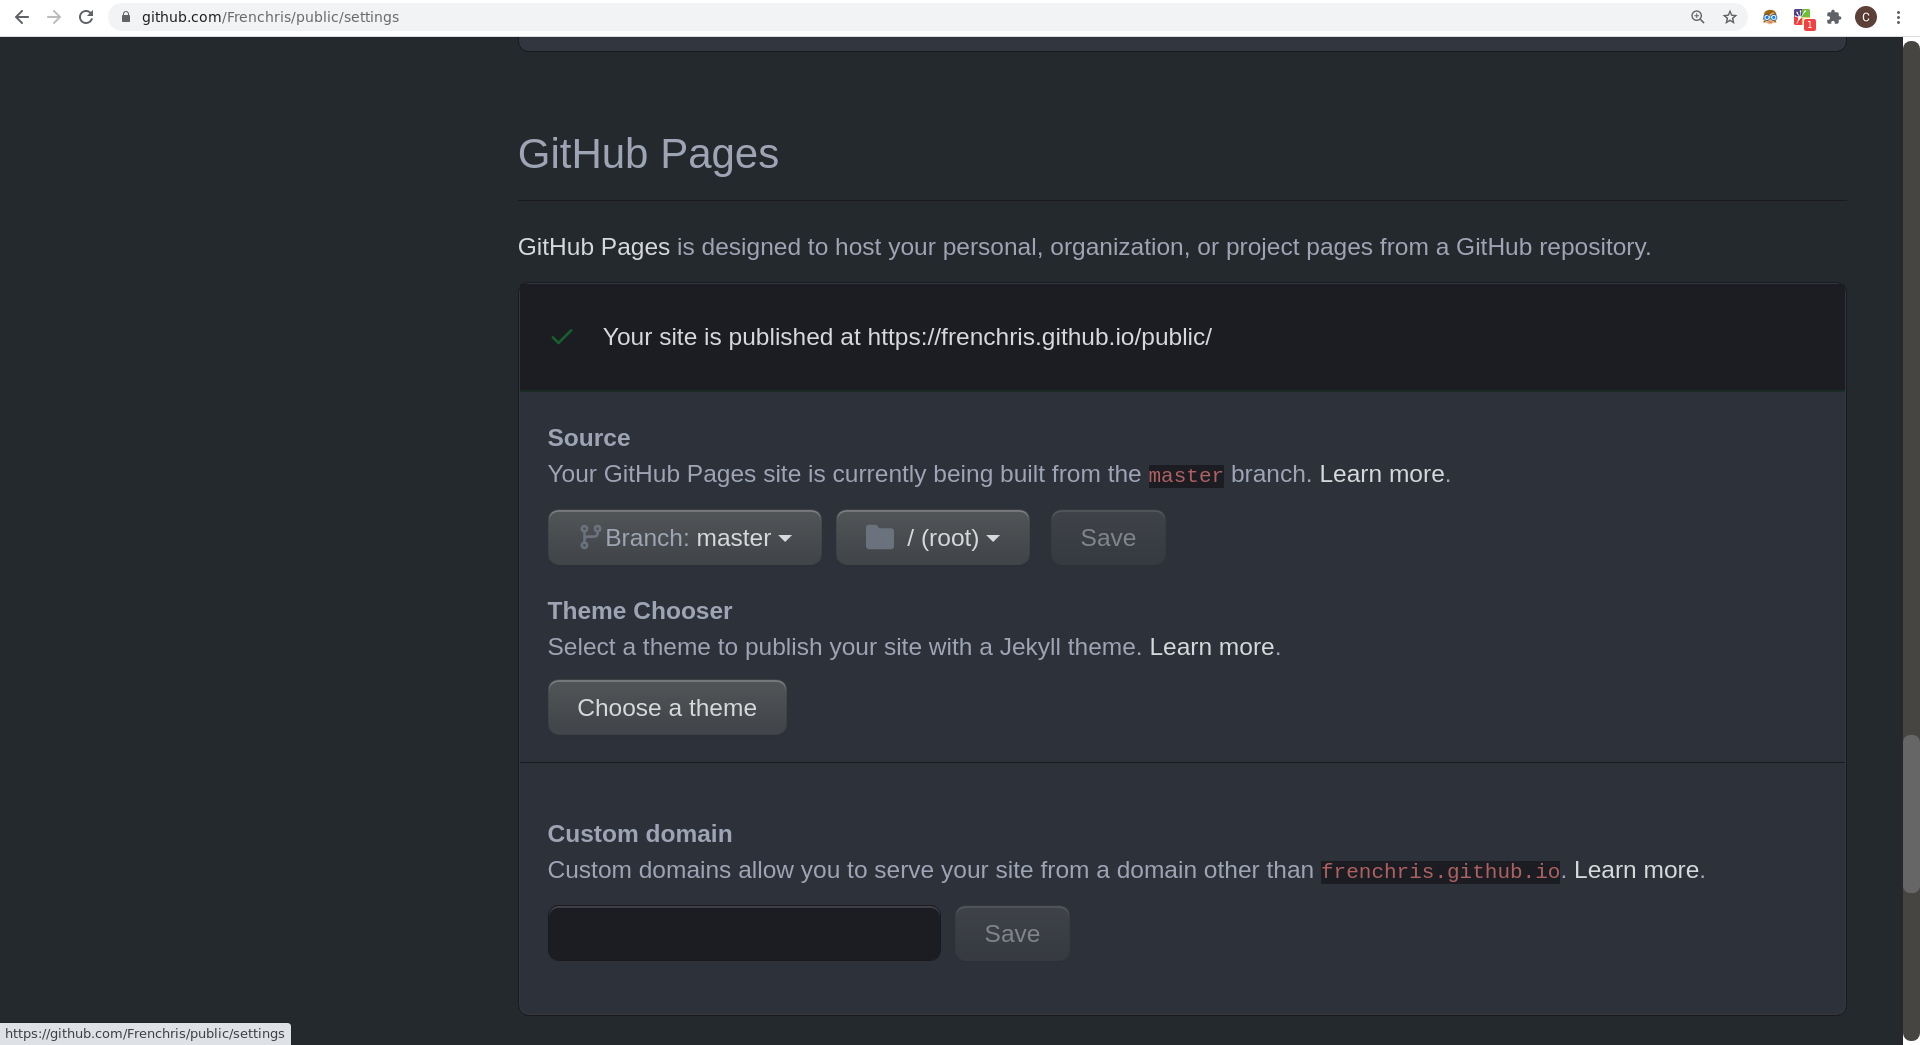
- You will notice that a message says Your site is published at “https://yourgithublogin.github.io/nameofyourrepo”
Configuration of Docker image (if exercises tests need to be added)
The container runs with the following settings (options of docker run) :
--read-only- Mount the container's root filesystem as read only
--network none- Connect a container to a network without Internet
--memory 500M- Memory limit
--cpus 2.0- Number of CPUs
--user 1000:1000- Username or UID (format: <name|uid>[:<group|gid>])
--env EXERCISE=hello-world- Exercise name
--env USERNAME=aeinstein- Student's login
--env HOME=/jail- Home directory of the container
--env TMPDIR=/jail- Temporary directory of the container
--workdir /jail- Working directory inside the container
--tmpfs /jail:size=100M,noatime,exec,nodev,nosuid,uid=1000,gid=1000,nr_inodes=5k,mode=1700- Mount a tmpfs directory on
/jail, 100 MB writable.
- Mount a tmpfs directory on
--volume volume_containing_student_repository:/jail/student:ro- Bind mount a volume containing the student repository.
Example of a Dockerfile and its entrypoint.
The addition of a custom project
Take note of the paths of a project subject you added and add them to the attributes
Example:
If user Frenchris, added an exercise to the nameofyourrepo called firstproject
This is the path where the README.md subject would be.
https://frenchris.github.io/nameofyourrepo/subjects/firstproject/
Note that you do not keep the README.md at the end of the path but you do keep the /.
This path should be added to the attribute “subject” of type string in the object attribute of the new exercise.
Additionally the README.md audit path would be. https://frenchris.github.io/nameofyourrepo/subjects/firstproject/audit/
This path should be added to the attribute “subject” of type string in the object attribute of the new exercise.
-
Once both those path are noted, create your project on your server.
-
Add the regular attributes (
groupMin,groupMax,language,exerciseType). -
Add the optional attributes to test if your wish (
auditsRatio,auditsRequired) both set to 1. -
And add the
auditandsubjectattributes (of typestring) with the previously noted paths.Now that the attributes are filled.
-
Create a module, called
Div-customfor example. Add its standard attributes. -
Add
firstprojectas a child toDiv-custom.
Note: If you do not wish students from other events to be selected for matches in this new event. in the children attributes of the module,
- Add
matchWhereas aFUNCTION. - Set its value to
USERINEVENT. This attribute will isole the event during matches to the user of the event. - Add this
Div-customas a child in your campus object. - Go to event, and launch the event
yourcampus/Div-custom. - Add yourself and other testing accounts to the newly launched event.
- Test your subject by creating a group and launching an audit If the paths are correctly inputed and your repository is correctly publicly published on GitHub pages, you will see your subject and your audit in the platform.
Setup of your Docker repository
- Sign in your Docker Hub account and link it to your repository.
- In your account, go to your settings and link your GitHub account.
- Create a repository named “test” and make sure that your GitHub account is linked.
If you see this image,
 It means your GitHub account is correctly linked.
 - In the Builds tab configure the automated build settings as below (for the go tests).
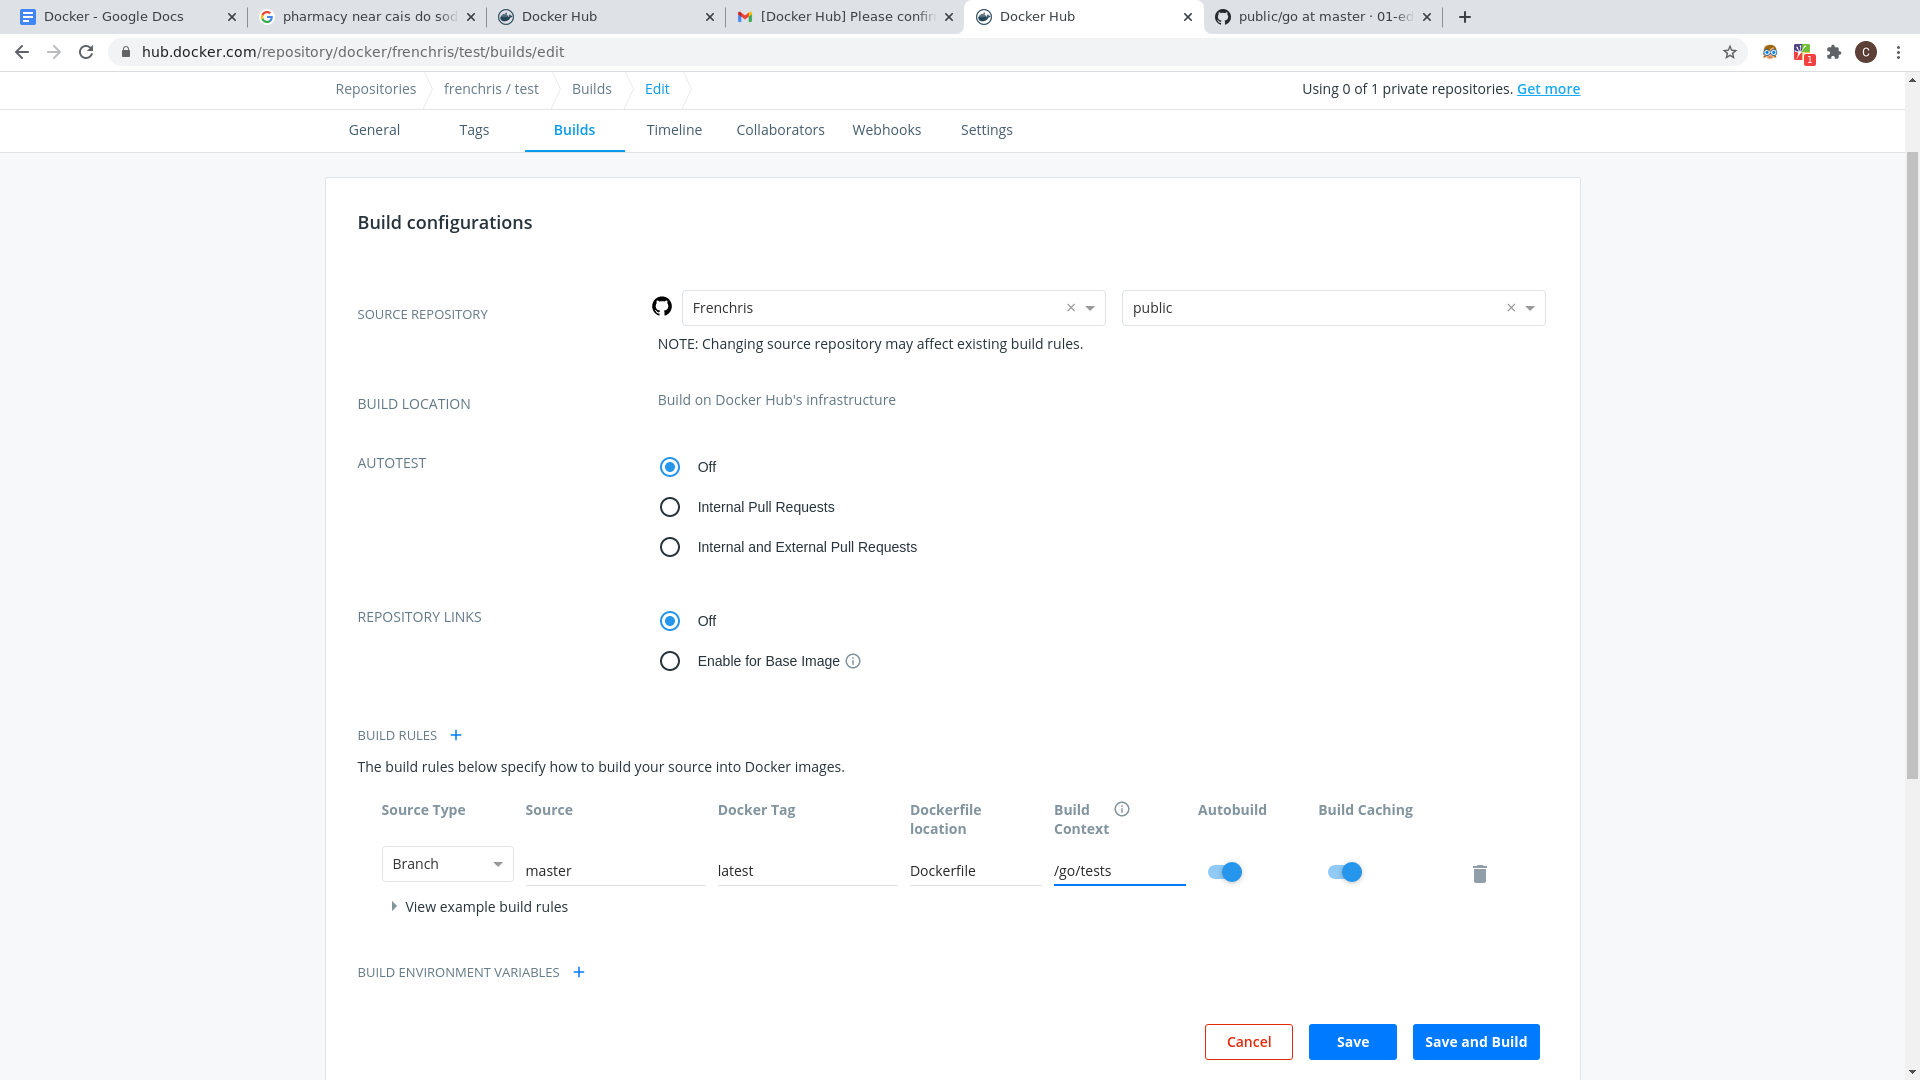
- Once the build is complete (it can take 5 to 15 mins). Go back to the attributes of the exercise:
- Add the attribute testImage (type string).
The
testImageattribute is the name of the Docker image used to run the container responsible for testing the student's code. - Fill it with the name of the repository, in this example: frenchris/test
- Add the attribute testImage (type string).
The
- Once your exercise has both the attributes completed correctly, the exercise is viable and can be tested on the server which was selected for its addition.
- As a reminder to test the exercise it is suggested to follow these steps:
Createa customQuest-testobjectAddingthe newexerciseobject as a child to the newly createdQuest-testobjectCreateaPiscine-testobjectAddingthe newQuest-testas a child to the newly createdPiscine-testobjectAddingthePiscine-testto thecampusobject as first child- Go to the event page and launch the newly created
Piscine-test. (You may need to refresh the page 2-3 times before thecampus/Piscine-testoption appears) - Once the event is launched, use the event page to add yourself as a student in the launched event
Piscine-test - You can now try the exercise. If everything is well set, the subject should be loaded and, when you submit a correct solution, the exercise should pass.